STATUS: INACTIVE // READ-ONLY

Blog

  • Looking for blind spots

    In sharp contrast to the usual method of practicing, which is locating and correcting mistakes, my approach could instead be described as looking for blind spots. As always, I stress awareness over correctness. True change and improvement can only come from this place.

    What is a blind spot?

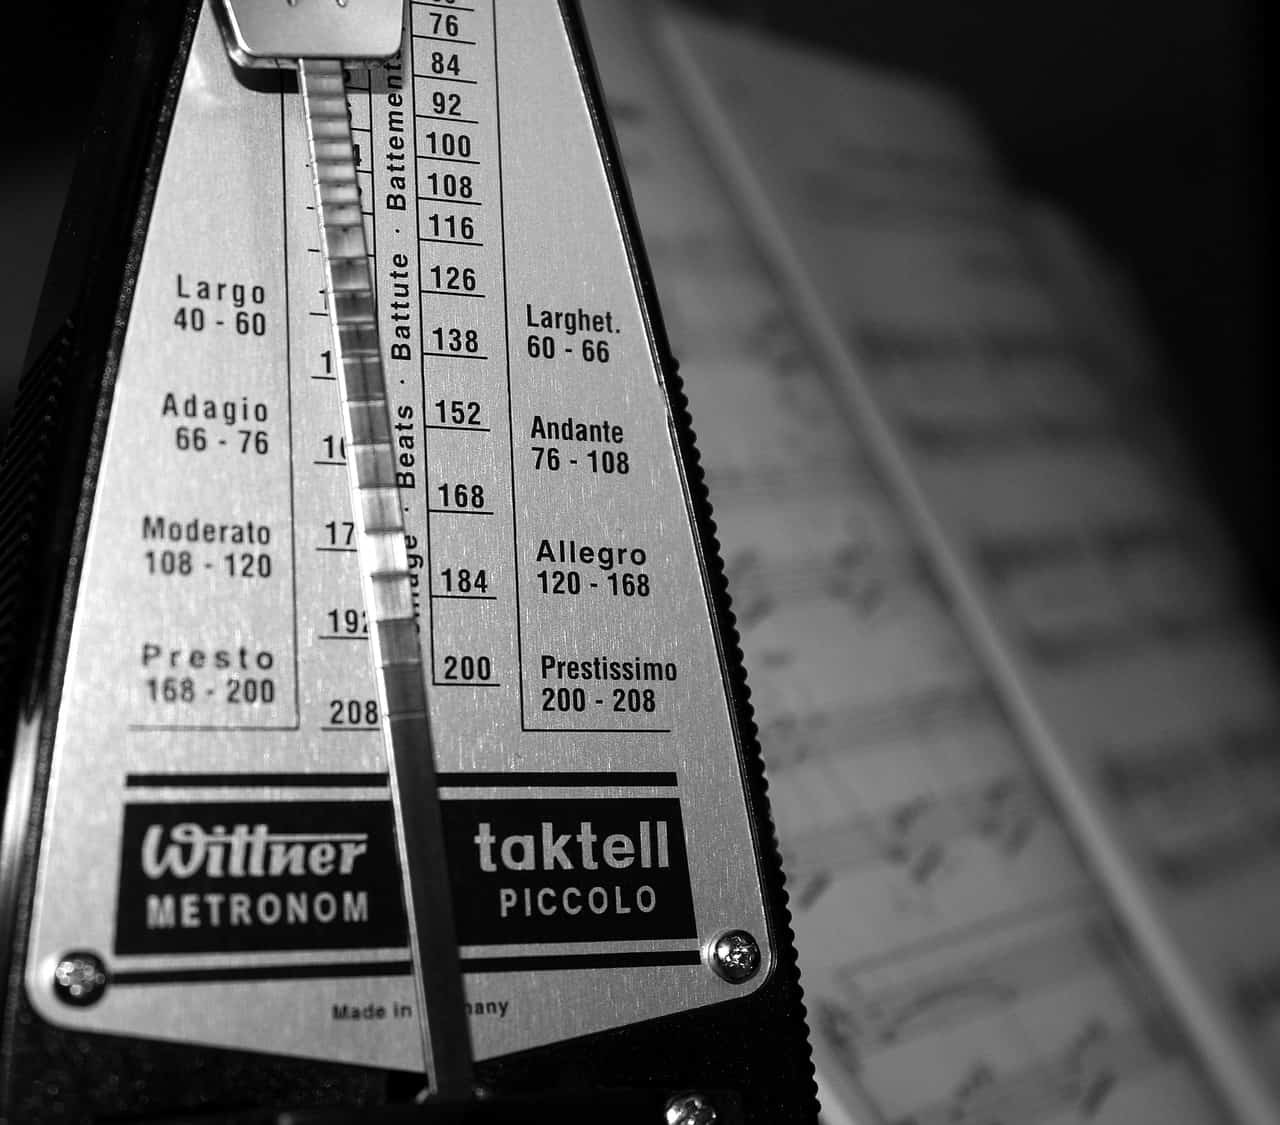
    As I have written about, there are many things you can choose to focus on while practicing. Pick one and stick to it. It could be the breath, it could be the dropping of the arms, or the sound of the metronome, or anything else you choose.

    The idea is to observe, without judgment, without trying to control anything. You may find that you start judging, or that you start trying to control. This is not a problem. Just bring your attention back to the point of focus.

    A blind spot is a period of time where you are lacking awareness of your focus point. Again, the object is to keep your attention fixed on one place, exclusively.

    You need to observe the breath as it happens while you are playing. You need to observe exactly what your playing does to the breath. You need to observe every temptation you have to take your mind off of it.

    What causes blind spots?

    If I ask you to play a piece of music and focus exclusively on the breath, you will find many things that you pull your attention away.

    • You will play a wrong note and start thinking about that.
    • You will suddenly notice that your hands are in the wrong place for the next chord, and will rush to move them quickly.
    • You will remember something your teacher told you about how to phrase this particular section.
    • You will feel tension in your hands and try to relax them.
    • You will notice yourself holding your breath and try to breathe more freely.

    All of this takes your attention away from the sensation of the breath itself, which is the target of your focus.

    A few suggestions

    Choose a focus point, set a timer, and commit to returning to that focus point whenever your attention wanders, for the duration of the timer.

    Try “zooming in”. Play a section fast, noticing how steady your attention is (or isn’t). Stay there for a bit. Let yourself explore every crevice of the activity, every detail of the music, every moment in time. Then, slow it down bit by bit, observing what effect this has on your focus, on your experience of the sensation you are trying to focus on. The waterfall technique is based on this idea.

    If you are like me, you might be asking “doesn’t checking if I am focused ruin my focus?” Yes, it does. However, the idea is not to insist on 100% focus. This is a completely impractical goal. Instead, the idea is to experience what happens when you try to focus, to notice what tries to pull you away, and to have the chance to decide for yourself how you want to react to it. Until you notice it, you have no choice.

    This is what practicing is.

    It is not “repeating something perfectly” or “trying to get it right” or “getting more comfortable with it”.

    It is simply looking for blind spots.

    You want to distract yourself. You want to find something you are good at and vary it slightly in order to completely mess you up. That is the whole point.

    Try it and see what happens.

    The role of a teacher

    You don’t need a teacher to practice this way. All of the teaching is fundamentally within you, and within the exercise itself. Nonetheless, a teacher could be helpful, as it is often easier for an outside observer to identify areas in which you might have a lot of blind spots.

    Letting go

    I need to emphasize the role of acceptance in this process. When you commit to focusing on one thing, you are simultaneously making the commitment to let something else go. A lot of students are completely stuck on this point, and insist that everything I am saying is crazy as a result. I need to stress that if things aren’t working for you, you may need to change what you are doing in order to get moving again. And, this may involve letting go of some cherished rules you may have (e.g., “I must never make a mistake or it will be there forever”, or “I must always play musically”, or “I must learn the notes first before I add expression”).

    Then again, if things are working, don’t take anything I say as an insistence that you must change anything.

  • How to Practice the Piano

    How to Practice the Piano

    When you practice the piano, do you just sit down and play, hoping that you won’t make any mistakes? This is common but counterproductive.

    I am quite familiar with the experience of being a student in a lesson and feeling like I have no clue how to fix everything, how to please the teacher, or what the heck I’m supposed to be doing right now. Teachers don’t help matters by encouraging the student to focus on whatever the teacher or student is most worried about. So, it is no wonder that students often don’t have a clear idea of what they are supposed to be focusing on while playing the piano, and seem to lack the ability to focus on anything.

    In this article, I will explain why pianists generally don’t practice very well, and I will describe 4 specific things you can focus on while practicing piano.

    Wrong ways to practice

    There are two big mistakes pianists make all the time:

    What NOT to do while practicing piano

    • Chase feelings
    • Chase mistakes

    Chasing feelings


    Sometimes, we try to reproduce a feeling we experienced in the past. For example, if I played well at home and felt confident and in control, I might try to achieve this same feeling in my lesson.

    Chasing mistakes


    When we are practicing, we might have an intention to work on one thing, and then change focus when we notice another mistake that begs for our attention.

    This is also counterproductive.

    Don’t focus on the thing you’re trying to fix


    Surprisingly, it can be a mistake to focus on the thing you are trying to correct. For example:

    • To find a good fingering, don’t focus on the fingering while you play (try not to even write in fingerings).
    • To correct wrong notes, don’t focus on the notes while you play. 
    • To avoid rushing, don’t write “don’t rush!” in the music and trying to heed this advice while you are playing.

    It is only natural to want to try to fix our mistakes. However, it just makes it worse. Instead, focus on something simpler, with an eye toward trying to identify what is causing you to make the mistake, rather than trying to fix it. Trying to fix mistakes themselves often leads to frustration and a feeling of effort and is generally not the most efficient way of fixing problems.

    When you practice the piano, pick one thing to fix your attention on for the duration of the session. This can help you understand better where you are avoiding putting your attention, and why. 

    What TO do while practicing piano

    • Focus your attention on one thing at a time

    So, what should you focus your attention on?

    Focus point #1: The metronome

    Many pianists who are not used to the metronome find it stressful. The only way to deal with this is to get used to it. 

    Practice tips:

    Listen to the clicking of the metronome, and listen to how your playing aligns with it. If you are not with the metronome, listen to that as well. There is no need to fix it. Check out my post on how to use a metronome.

    Focus point #2: Your arms

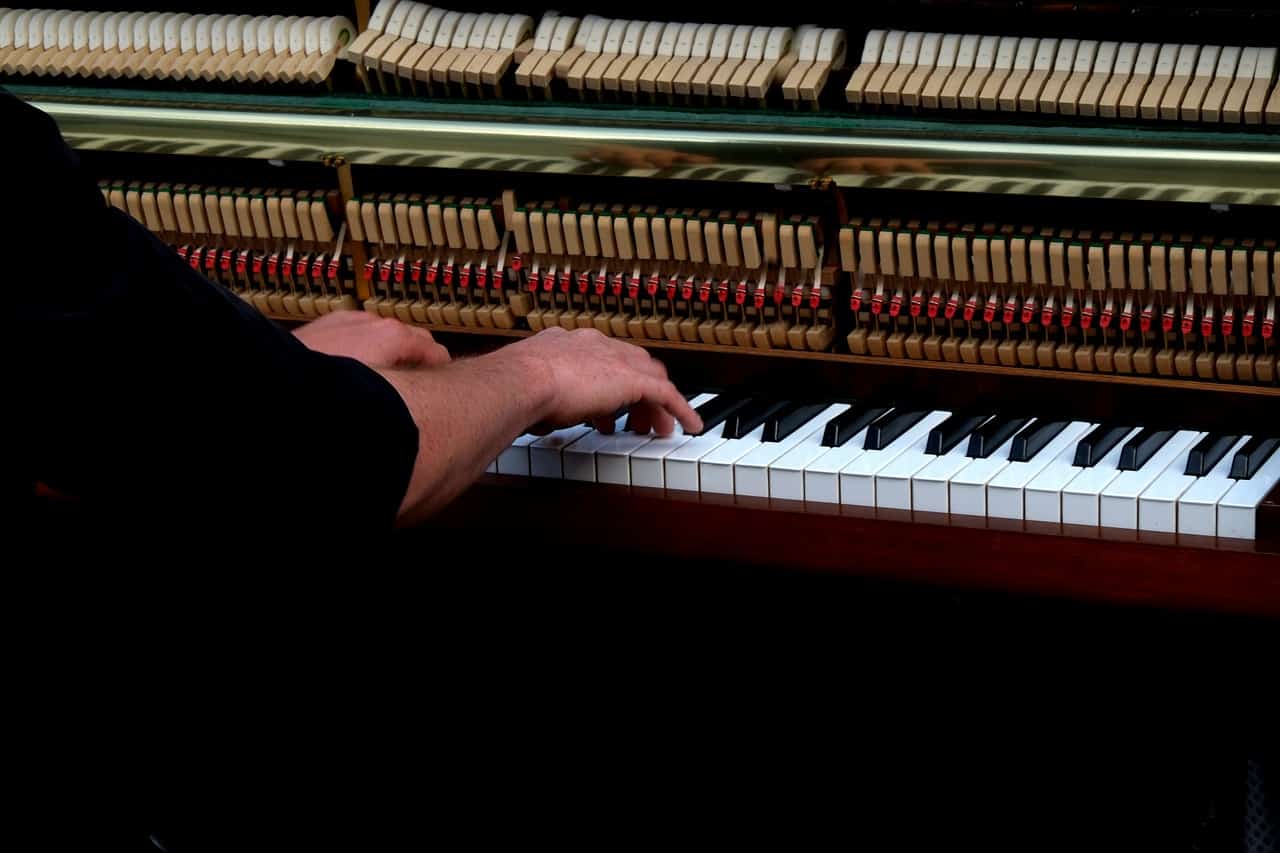
    It can be very useful to think of piano playing as being about dropping the arms onto the keyboard. Here, you can focus on the feeling of release in the arms with each beat. This makes thinking about technique much simpler than having to worry about the tiny movements of the fingers.

    Practice tips:

    As you play, focus on how your arms drop onto the keyboard with each beat. Even if you make mistakes, make sure that rhythm in your arms is not interrupted. Keep the attention on the dropping. Not on the lifting. Not on the notes.

    Focus point #3: Your body

    Piano playing is a whole-body activity. It’s not just about your arms. So, the more awareness you can gain of your full body, the more awareness you will have of your piano playing.

    Practice tips:

    The breath can be a remarkably reliable indicator of your physical state in general. When we feel anxiety, we tend to hold our breath, or otherwise interrupt it suddenly. If you keep your attention on the breath, it is amazing what you will become aware of.

    Focus point #4: The sound

    Normally, our brains interpret sound coming out of the piano as music. If the music sounds right, we get lost in it, much in the same way as we get lost in the imaginary world of a good novel or film. If the music sounds wrong, it can make us feel physically uncomfortable and anxious. It is good that we can experience both of these possibilities, but they also take our attention away from the task at hand. 

    Practice tips:

    Try focusing on the sound, not on the music. If you play a wrong note, hear it without reacting to it, without trying to correct it. If a chord progression captures you and makes you feel excited, don’t react to it, but rather try to hear it as simply sound, with zero emotional content.

    Creating a piano practice routine


    In a given practice session, you might combine all 4 of these focus points, spending a certain amount of time on each. 


    Here is a sample piano practice routine (1 hour):

    1. 1
      Choose a piece to work on for the entire practice session.
    2. 2
      Play the technically difficult sections, focusing only on the rhythm in the arms (15 minutes).
    3. 3
      Play the entire piece over and over, focusing on the breath and whatever other bodily sensations show up (15 minutes).
    4. 4
      Spend the remaining time listening to the sound as you play, noticing whatever feelings it provokes in you (15 minutes).

    You can also develop similar routines to help you practice scales or other technical exercises.


    Feel free to mix things up as much as you are able to. Studies show that interleaved practice can be quite effective. 

    Your turn


    The most important thing is that you have a clear sense of what you expect as you practice the piano. So, give it a try. Take a few suggestions from this article, build a practice routine for yourself, and let me know how it goes!

  • More about the waterfall technique

    I would like to address some of the rationale behind the principles of the waterfall technique. The technique is seemingly too simple, but every aspect of it exists for a reason. Hopefully, this will address many common concerns.

    These principles I will address include:

    • Starting really fast
    • Going down instead of up
    • Going down on click at a time
    • Focusing on arm drops
    • Focusing only on arm drops
    • Not correcting mistakes
    • Playing a large section of music

    Let’s look at these one at a time.

    Starting really fast

    The instructions for the waterfall technique are to start at the maximum tempo on the metronome (which on my metronome is 208 beats per minute).

    It is important to understand that this technique is intended for long-term growth at the piano, not short-term mastery of pieces. If your goal is to learn a piece by next week, or to be able to play at 50% tempo to satisfy your teacher in your lesson tomorrow, there may be faster ways of achieving these goals (you should also be prepared to accept that these particular goals may not be possible for you at this time).

    With that in mind, we could imagine a few possibilities:

    1. Start at the maximum tempo on the metronome
    2. Start at the final performance tempo
    3. Start at something less than the final performance tempo

    Starting at the maximum tempo is designed to teach you maximum freedom. This is freedom you will need to play at any tempo, and it will serve you in every piece you play. Additional, in my opinion, it is an effective way of avoiding learning injurious habits (movements that can cause injury at slower tempos will become impossible to even attempt at a fast tempo).

    So, the above list is sorted from long-term benefit to short-term benefit.

    You are free to modify the waterfall technique and start at any of the tempos given above (or any other modification you think would be useful).

    Going down instead of up

    It is a common practice to start at a slow but comfortable tempo and ramp things up as mistakes disappear. You should understand that the waterfall technique essentially does this as well, but in a way that avoids certain problems. Namely, some things work at slow tempos but not at fast ones. If you start at the bottom, you may perfect the piece at a slow tempo, using physical movements that are simply impractical at a fast tempo.

    The idea is to keep things integrated. We want to start with the end result in mind. I want you playing the piece at full tempo immediately, and then only drilling down when you realize that something isn’t working.

    Going down on click at a time

    In some sense, what I’m after is this: Play the piece, and notice what mistakes occur. Play again, checking each time to see if your mistakes are still present. Essentially, repeating the piece at the same tempo.

    On some level, I suspect that staying at a fast tempo and never slowing down would work. Practically, I do slow down when I realize there is a problem, because I want to see it more clearly. The idea here is to do it very gradually, so that at no point do I fundamentally change the way I’m playing. Going step-by-step helps to ensure that you are only making tiny changes in the way you play.

    It can be frustrating to decrease only by a single click. Remember that you are free to decrease by more clicks if you’d like. But, you should understand that the goal is not to play correctly. It is to zero in on the spot that is giving you trouble, repeating it until you see exactly why you are having trouble (and you may never know how to put this insight into words). Slowing down the tempo is just a way of facilitating this.

    Focusing on arm drops

    The arm drops are the beats. They are the fundamental structure of the music. Everything you play needs to be conceived mentally in terms of a sequence of beats. The audience will have the illusion of a continuous flow of music, but for you it should be one thing at a time. The arm drops help you with this. They are a simple physical gesture that you can use to formulate any interpretation of the piece at any tempo.

    It is of no consequence whether or not you are dropping your arms correctly at the fast tempo. Take a guess and do it. The idea behind the practice is to, over time, begin to understand either (a) how to make all of the other details fit the guess that you made, or (b) why your guess can’t possibly work. That’s it.

    There is nothing sacred about “arm drops” from a physical perspective. The fact of the matter is that often you won’t actually be dropping the arm solely with gravity. This is a psychological tool. Try it, and see if it works.

    If you have a better way to play a beat, something that will work for all styles of music, at all tempos, and all dynamic levels, go ahead and use it. For example, “tapping your foot”, or “conducting”, or “bopping your head” could all work. I am simply looking for something more digestible than “playing the piece on the piano”.

    Focusing only on arm drops

    The point of focusing only on the drops is to have a steady point of focus that you can return to over and over. Additionally, it is to have specific points at which you can check if there are mistakes. It is far easier to ask if the notes that fall on the beats are correct than it is to ask if there were any mistakes at all.

    Sometimes, I will play a section and have no clue if there were any mistakes. Having somewhere specific to fix your attention, somewhere that doesn’t take you out of the piece as an integrated whole, can make this task much easier.

    I should emphasize that this is an exercise. I am not suggesting that you only ever think about arm drops while you are playing. Try this and see what the obstacles are.

    Not correcting mistakes

    The waterfall technique asks that you don’t stop to correct mistakes as you make them. This is a huge difference from how most people approach music practice.

    The problem, as I see it, is that when you make a mistake, you don’t necessarily even know if it is:

    • Fixable: Just because you observe it doesn’t mean you know why it happened, and until you know that, how are you going to fix it?
    • Important: Some mistakes are not as apparent to the listener as we think they are. When we are performing, our attention is often drawn to whatever is making us most anxious, or whatever part of the piece we are most worried about. Sometimes, this may be a relatively minor detail, almost inconsequential in the grand scheme of things. I want your conscious attention always on the big picture. If the mistakes are truly a big deal, they will eventually affect the big picture, if you practice this way.
    • Actually a mistake: Often, we aren’t sure if we played something correctly. Or, we think it must have been wrong, but we don’t really know this for a fact. I don’t want you relying on those types of feelings. Many musicians become almost neurotic, assuming they must be making certain mistakes, because teachers have always gotten on their cases about those issues. Only fix mistakes if you know they happened. Otherwise, you are potentially distracting yourself and wasting your time chasing something that may not even be real.

    Playing a large section of music

    There is nothing wrong with zooming in on a tiny section of music to work on it. However, there is also something to be gained from committing to a large section and playing it to the end. This way, you stay in playing mode and out of problem-solving mode. Ultimately, this is the place from which you want to perform, as it is the only place that truly lets you express the music.

    Conclusion

    Let me repeat that the waterfall technique is for developing insight that leads to progress in the long-term. It is for discovering and surpassing limitations you may have that affect every piece you play, not just the one you happen to be working on at the moment.

    Sometimes progress doesn’t go in a straight line. Sometimes you have to go backwards before you go forwards. Often, ways of playing that seem to “work” are actually holding you back in the long run, and changing those habits can cause things to fall apart for a while before you learn to put them back together.

  • Practice demonstration – Bach B major fugue

    I’d like to demonstrate some practicing using the waterfall technique. I chose the B major fugue from Book 2 of the Well-Tempered Clavier. Although I have played many Bach fugues, this particular one was completely new to me. It is a 4-voice fugue, with a lot of complexity. Here, I show how the fugue can be learned without ever trying to unravel that complexity.

    I did this in 3 sessions of approximately 20 minutes each, with short breaks in between.

    I have divided the demonstration into 4 videos, shown below along with some notes relating to specific points in the videos.

    First session

    00:00

    For fun, I decided to sight-read the whole fugue from beginning to end, with the metronome. I approached this from the angle of simply dropping my arms to the beat, not caring what notes I hit. Many of them were right, many were not.

    4:10

    Set metronome to faster tempo, work on very beginning (mm. 1-9), reducing by one click each time. Always, the focus is on dropping the arms with the click.

    6:50

    Set metronome to 208 and work on mm. 1-27. Reduce by one click each time. No effort is made to correct any mistakes or work out any fingering. I am simply playing over and over, paying attention to what happens. The tempo is way too fast, so there are certainly plenty of mistakes. But, it doesn’t matter to me at all. At this tempo, I am only working on focus, poise, and balance. These skills need to be dragged down to the slower tempos. If I started at the bottom, that might never happen.

    10:30

    The right hand is just playing the same cluster of notes over and over for a few times. This is probably because my attention was focused more on my left hand at this point.

    Throughout this process, there were several mistakes I noticed which kept occuring. I made no effort to fix them.

    19:00

    Around this time, I started to notice that my attention had been pulled into the music and away from the arm dropping. You can perhaps see how I correct this by bringing the attention back to the task at hand.

    Second session

    5:08

    I reach the lowest setting on the metronome, 40 bpm, and yet I still have mistakes, so I dial it back up to 80 (playing at the same tempo, but the metronome is now twice as fast) and focus on dropping every two clicks.

    15:58

    I felt that the most recent play-through was pretty flawless, so I dial it back up to 208. Was it actually flawless? Don’t know, don’t care. This was my perception in the moment, which is all that matters.

    I continue working like this, reducing by a couple clicks each time, never trying to fix mistakes, always focusing on the dropping of the arms.

    Yes, sometimes I notice mistakes. And sometimes I fix them. If it happens, it happens. If not, no big deal.

    Third session

    16:55

    I again play flawlessly (at a slow tempo), and so I dial it back up to 208 and do another round.

    At this point, I am eager to wrap this up, so I reduce the metronome by several clicks each time.

    By the end of this video, I feel I am playing pretty well at a good performance tempo, so I decide to shut off the metronome and play one last time to admire my final result.

    Final result

    With the metronome off, I ran through mm. 1-27 one last time, allowing myself to play as musically as I wished. Also, all of my practicing up to this point was without pedal, but I decided to use the pedal here.

    I am happy with the final result. Is it perfect? Of course not. But, it has its own perfection in that it is exactly the natural consequence of the work that I did.

    Are there faster ways to learn a piece like this? Maybe. I tried to be pretty strict in how I did this, as I wanted to demonstrate this technique in its purity. And even I got impatient and rushed to the end.

    As I see it, here are the distinct advantages I experienced doing it this way:

    1. The work I did will stick with me for a while. The mistakes that got corrected will stay corrected for the most part. If I pick this up again in a month, I will not feel like I am starting from scratch.
    2. I never felt pressure from speed. I never felt out of control for any reason.
    3. I never had to stop to work anything out. I never cared why I made any mistakes, so I didn’t waste time trying to figure them out. Same thing with fingering. I don’t even know if I ever used the same fingering twice. It’s not any of my concern. If the fingering isn’t obvious, I don’t care about it. This frees up my attention considerably.
    4. The whole process was fun and relaxing. I never felt like I was “working” on anything. I was just grooving to the beat the whole time. I could have gone on for another hour with no problem, but it was getting late and I had other things to do.
    5. I felt liberated from any responsibility of having to fix any of my problems. It is great to know that I am playing the best I can possibly play.

    It cannot be overstated how important it is to have a method of practicing that is enjoyable. It doesn’t matter how “efficient” your method is if it makes you feel worse about yourself and about the process, or even pushes you to quit altogether.

    There is certainly more to do with this fugue. I could learn the rest of it, for example. I could analyze the score. I could memorize it. I could record it and listen back with an ear for details. And I would do any of those, depending on what my desired outcome was, and how much time I had to work. But, this is a start.

  • Rhythmic flexibility

    I’d like to argue for a concept that I believe is sadly lacking in most music studios. For lack of a better term, I will call this rhythmic flexibility.

    Rhythmic flexibility is the complete internalization of the rhythm of a piece, to the point where it is a totally natural part of you. It’s a vague concept, perhaps, and I don’t know how to define it precisely. But, I know it when I see it, I know how to test for it, and I know how to train it. So let’s talk about that.

    How to test for it

    Rhythmic flexibility means that you:

    • can play the piece at any tempo (whether or not the notes are perfect).
    • have a clear understanding of where all of the beats are in the piece.
    • are aware of the beats as you play them.
    • can play the piece with any note value as the beat.

    If you hesitate while playing, you don’t have it.

    If you get confused when you try to play at a different tempo, you don’t have it.

    If you get thrown off by a complicated rhythm and lose your sense of pulse, you don’t have it.

    If you ever accidentally subtract a beat from a measure, or add one, you don’t have it.

    Now, as much as it sounds like an all-or-nothing deal the way I’m describing it, this isn’t the case. There are times I make all of the mistakes listed above. Rhythmic flexibility is a mindset that governs your whole way of looking at music, and it’s a skill that needs to be practiced. Sometimes you’re in the mindset, and sometimes you aren’t.

    Why bother?

    Rhythmic flexibility is non-negotiable. It is a fundamental starting point for any interpretative work on a piece. I do not want to tell you how to phrase, where to speed up or slow down, what notes to voice, etc, until you clearly have rhythmic flexibility. It will not work.

    Why is it so important? Rhythmic flexibility practically eliminates problems relating to:

    • Phrasing
    • Tension
    • Memory blanks
    • Playing in tempo (following a metronome or a conductor)
    • Playing out of tempo (rubato, ritardando, accelerando)
    • Speed
    • Feeling disconnected from the music
    • Breathing (if you’re a singer)

    If you can play a piece with a clear sense of the beat, with a metronome, at any tempo, you have already solved most of the issues behind the above list. You are playing the piano, rather than the piano playing you. Now, we can just listen to music, talk about our personal opinions on interpretation, and experiment. It’s really all fun and games from this point on.

    If you can’t do this, it is a complete exercise in frustration trying to fix these problems one at a time. You are trying to stretch the beats for rubato, but you have no clue where the beats are, because you are so caught up in the music with all of its infinite complexity. You are trying to recall what happens next, and you can’t, so you stop playing, because you are trying to remember a difficult piece of music instead of just playing the next beat (no, this isn’t a complete solution to memory, but rather a prerequisite).

    How to train it

    The waterfall technique is, in my experience, an effective way of training rhythmic flexibility. There are other useful exercises, too, which I will write about in future posts.

    You should use the metronome. You should play faster than you are capable of. You should play slower than you are capable of.

    By the way, this is how phrasing works. Once you have felt every note as being the beat, at every tempo, you have complete control over the relative intensity of each note. It doesn’t make your decisions for you, but it takes you out of the realm of “how on earth am I supposed to know what to do?” and into “I have ten options that could work here…let me see which one I like best.” And that’s the point of music study, as far as I am concerned.

    This is about being super-clear on where the beat is. It is also about being deliberate about where the beat is. You decide which note gets the beat. You are the artist.

    A quarter note? A half note? A whole note? A measure? Two measures? Four measures? You need to be able choose any of these, and play accordingly.

    If you can do this, you’ve got it.

  • Let Me Take You DEEP Into Scale Playing

    Let Me Take You DEEP Into Scale Playing

    Lots of pianists hate practicing scales and arpeggios. Big surprise there… I would rather jump off a cliff than practice scales the way they’re normally taught.

    So put that shit away and try a totally new, KorMusic, approach. You can benefit from these ideas. They will untie knots, physically and mentally. Some of it may seem weird, like I’m telling you not to play well anymore. I do think you should play well. But, you can only get there by untying knots first.

    In this article, I will address some common questions about scales and arpeggios. I will also describe a sequence of exercises that will change the way you look at scales (if you do it seriously!).

    Listen to my podcast episode:

    Why I Got Obsessed With Piano Scales

    Get my e-book

    I wrote this ebook because I want to share what I’ve learned about what’s wrong with the way the piano community treats “amateur” pianists. I don’t like it, and I want to change it.

    It is rare to see something written for serious adult amateurs, and by someone who went that route. I had it on as an audiobook while doing chores – the first chapter on various aspects regarding teachers, I was saying “right” and “certainly” out loud a few times. 😀 A lot of the things, I wished I’d heard this when I first started my first ever lessons some time ago; it took me years to at least partly find my way out of holes due to some of those things.

    Inge

    Amateur Pianist

    Why practice scales and arpeggios?

    Scales are easy to remember. They contain several core difficulties in piano playing. They are like kata in martial arts: basic building blocks. If you have mastered them at high speed, it’s pretty safe to say that you have certain elements of piano technique under your control (muscle memory). If you have not mastered them, then you know what you need to work on. Fast playing cannot happen without this mastery.

    Can’t you get all these benefits just from practicing repertoire?

    Yes, but…repertoire is too interesting. It’s too musical. It tends to suck you into its own world. If you’re lost in the music, you’re not going to be paying attention to your body or the technique.

    The most interesting thing about scales and arpeggios is the technique, and this is precisely why they are helpful.

    They’re boring as music. But, if you can find a way to enjoy the technical side of them, you win.

    I think scales are fun and relaxing to play. This is only because of how I practice them.

    So far, I have talked mainly about the physical benefits of learning scales. However, there are a few other benefits worth mentioning, especially for beginners:

    • Scales will help you learn all of the key signatures, which will help with sight-reading.
    • Scales with varying combinations of white and black keys will help you with fingering and being able to feel your way around the keyboard.
    • Scales will help you play repertoire, especially that of the Classical period, that uses a lot of…scales.
    • Practicing all of the major and minor scales will help with improvisation.

    When you look at the big picture, scales and arpeggios are crucial to your piano training.

    Practice tips:

    Before you sit down to practice scales, ask yourself “why am I practicing scales?”

    Make sure you have an answer to this question before practicing. If you can’t answer it, don’t practice scales!

    Why are scales and arpeggios so boring?

    Scales are not boring. The way you are practicing them is boring. You need to approach them differently, if you want to make them interesting.

    Many teachers will recommend playing scales in more complex patterns or rhythms, in order to mix things up. I’m not even suggesting that. Instead, I am asking you to play the same patterns you are playing now (or that you stopped playing, out of boredom), but to add some curiosity to them.

    Practice tips:

    Look at scales and arpeggios as a meditation practice. (By “meditation”, I don’t mean relax or take it easy. I mean hardcore practice that will train your mind.)

    How much awareness can you bring to the way you are playing? What do they feel like physically? Are they easy, or hard? How “correct” are they?

    Can you ask these questions without trying to improve your playing? If you take an interest in what you are doing, it might become interesting.

    How can I enjoy practicing scales and arpeggios if I’m not good at them?

    No one likes practicing what they’re not good at.

    But, what’s the point of practicing?

    To repeat over and over what you’re already good at? Or, to get better?

    If you aren’t good at scales, what else aren’t you good at? Is it possible that spending more time on scales might help you improve in other areas? If not, don’t bother.

    Are you avoiding something only because it is uncomfortable? Or, is it really a waste of time? Use your own experience to guide you.

    You can get better at scales, if you put in the time.

    Practice tips:

    You’re not playing scales and arpeggios the way you’d like to be playing them. Get used to it. It doesn’t have to be a bad thing. It’s just how things are.

    Remind yourself why you are practicing. Is it only to enjoy what you’re already good at, or is it also to get better?

    Are piano scales important?

    Many piano student hate practicing scales and arpeggios. They are what make piano lessons stereotypically tedious and boring. Everyone knows this. So, why do piano teachers insist that you practice them? Do you actually have to practice scales?

    There are certainly a large number of pianists who don’t practice scales (I’m told Daniel Barenboim is one of them). Sure, you can get everything you need from the repertoire itself. You can make technical exercises out of the pieces, and in this way practice exactly what you need.

    Besides, lots of music doesn’t even have scales. If you want to play this music, playing scales is a waste of your time.

    So, should you practice scales?

    Yes. 

    But…not if you’re half-assing it. If you see it as drudgery you have to slog through before you get to the really fun stuff, you’re missing the point.

    Practice tips:

    If you don’t believe something is important, don’t practice it. As an artist, you need to take responsibility for your own training. Even if you are studying with a teacher who believes scales or arpeggios are important, you deserve to be satisfied that you aren’t wasting your time. Discuss your concerns with your teacher.

    Are arpeggios important?

    Everything I’ve said about scales applies to arpeggios as well. These are basic building blocks of music and of piano technique, so yes, they are important. But, you must practice them well in order to get benefits from them.

    Practice tips:

    Try different methods of practicing arpeggios. You might try this book (which covers both scales and arpeggios):

    How long should you practice scales and arpeggios for?

    For as long as you need to.

    I’m serious. If you have no problem playing scales or arpeggios, then you probably don’t need to practice them. But if scales or arpeggios are hard for you to play, it might be worth putting some time into them. You need to decide this for yourself, based on what results you are hoping to achieve.

    Practice tips:

    Start by devoting a small portion of your practice time to scales. For example, you could start every practice session by running through all of the major scales.

    Don’t try to play perfectly, as this might encourage you to spend too much time. As a result, you’ll likely get demotivated, and stay away from scales entirely. 

    BONUS lesson

    (for the brave and foolish):

    How should I practice scales?

    A step-by-step sequence.

    Many pianists struggle mightily with scales. For example, they struggle to play them fast, evenly, cleanly, and comfortably. It is also common to have issues with either the left hand going down the keyboard, or the right hand going up the keyboard. Scale-playing certainly did not come easily to me, which is why I spent the time thinking about how to re-approach the whole issue. Hopefully, you will find my explorations useful.

    This sequence of exercises is experiential in nature. That is, you must do the exercises as I have written them in order to understand what the heck I’m talking about. Even if your scales are great, please try this out on the piano. At the end of the day, the words are simply a narrative, describing a physical experience. This is about piano playing, not reading.

    OK, let’s get started.

    A first look at playing scales

    For the purposes of this article, we are looking at scales from a physical perspective. Each note of a scale has a musical function, but in order for the physical technique to work, the musical side needs to be on autopilot. When you practice the following exercises, you will use the metronome, and thus you will not have time to wait for tension to build, or anything like that. That’s fine. Let it build if it builds, and if it doesn’t, no big deal. As always when we practice, we focus on only one thing at a time.

    Exercise 1: One note per click

    • Set your metronome to 60.
    • Play a 2-octave C major scale. You can play hands separately, or hands together. The fingering does not matter. Your hand position does not matter. What matters is the following:

    If this is a piece of cake for you, you may go on. If not, set a timer for 15 minutes and repeat the exercise over and over, focusing only on dropping with each click. It does not matter if your fingering is wrong (there is no “correct” fingering anyway). It does not matter if the notes are wrong. If you find that it’s going too fast for you, are you really not trying to play the right notes?

    Question 1

    With the metronome set to 60, can you play this scale while consistently dropping on every click, regardless of what notes you are playing?


    If the answer is “no” or “I’m not sure”, continue working on this exercise.

    If the answer is “yes”, go on to Question 2.

    Question 2

    With the metronome set to 60, can you play this scale while consistently dropping on every click and consistently playing the correct notes?


    If the answer is “no” or “I’m not sure”, continue working on this exercise.

    If the answer is “yes”, you now know how to play a scale with one note per beat. You can play it slower, or faster. Try playing it at faster speeds. Go all the way up to 208 (the maximum on my metronome), if you’d like. It may be harder at a fast tempo, but that only means that you are working too hard. We’ll address that as we go.

    Exercise 2: Two notes per click

    • Set your metronome to 60.
    • You will now play a 2-octave scale.
    • Two notes per click.

    Now, ask yourself Questions 1 and 2 again, as before.

    Exercise 3: Four notes per click

    • Set your metronome to 60.
    • You will now play a 4-octave scale.
    • Four notes per click.

    Again, ask yourself Questions 1 and 2.

    If you can answer yes to Question 2 with four notes per click, you now know how to play scales. It’s now just a matter of cleaning up the rough edges. And they are probably really rough, so we will need to use some serious magic. Stay with me, because things are about to get weird…

    A closer look at your experience

    You should now understand what it means to play a four-octave scale in parallel motion with four notes per click. You should understand that it involves dropping your arms on each click, and nowhere else. If this isn’t clear to you, and you can’t do it fairly reliably, continue working on the preceding exercises, in the order I gave them, until you can do it. Don’t worry about being perfect. It’s enough if you get the basic idea.

    The ultimate goal, as it were, is to be able to take this way of playing and perform it at any tempo.

    Exercise: Go fast

    Try it now, at various tempos. If you can play at 120, you are in good shape, and can play fast enough to pass the RCM Level 10 exam. At 144, you are probably more comfortable with scales than most college-level piano majors. At 176, you should not have a problem playing scales in all but the most demanding repertoire. However, I want you to keep going, up to 208 (or whatever the max on your metronome is), whether or not you are playing correctly. Specifically, I want for all of these to feel exactly the same to you. At this point, you know the basic movements. You just need to do them, exactly as you learned them, only faster or slower.

    Easier said than done, I know. My guess is that you struggled to play faster. Do not worry about this. It means you have a lot of potential for growth!

    Let me offer something for you to consider

    The reason you can’t play faster is because you aren’t doing the basic movement anymore. You’re either adding something to it, or completely changing it.

    I don’t know what you’re changing. You probably don’t either. But you’re doing too much, and it’s slowing you down. We can’t attack this directly, as neither of us knows what it is that you’re doing. So, we need to approach this a different way.

    The next exercise will help you figure out what you’re doing wrong. I’m asking you to trust the exercise and let it teach you something. You may not know what it’s supposed to teach you, and that’s OK. You might not even agree with me that you are doing anything wrong, and that’s OK too. Just do the exercise and see if it brings up anything for you that you hadn’t noticed before. And if it brings up nothing, that’s OK too! Just notice what happens.

    Exercise: See the difference

    • Set the metronome to 60.
    • Play the 4-octave scale, always making sure you drop on each click.
    • Increase speed by 1 click.
    • Play again, always making sure you drop on each click.
    • Continue in this manner.

    Eventually, you will reach a point where things start to feel difficult to play.

    (Remember: always make sure you drop on each click!)

    It’s more important than playing the correct notes. If you need to, just drop your arms randomly on the keyboard instead of playing the scale! Just play for the correct number of beats (or approximately).

    Then, lower the tempo. Again, always make sure you drop on each click! When it’s slower, you might find it easier. Play the scale correctly. Then, go faster, click by click. If you need to, just drop randomly. Whatever. Blah blah blah. Completely fake it. Don’t worry, there’s a purpose to this.

    Move around randomly on the metronome.

    Try playing the scale at each tempo.

    When you go faster, you test it out, and it doesn’t work, so you give up and switch to faking it.

    When you go slower, you test it out, and maybe it does work.

    You test.

    You give up.

    Keep doing this.

    Question

    Do you see clearly that there are two different things you do while playing this exercise? There are two different moves you make in this game?

    1. You test.
    2. You give up.

    Sometimes you do one, sometimes you do the other. I don’t know when or why you do them, and maybe you don’t know exactly either. But maybe you’re starting to see glimpses of it.

    Do you see that?

    If “yes”, move on.

    If “no”, or “I’m not sure”, keep working on this until you see these two things clearly.

    Exercise: Feel the difference

    At this point, you should realize that when playing a scale, you have two options. Either you test in order to see if it’s working right, or you realize it’s too hard and you give up and switch to just pounding on the keyboard randomly. Now, I’m not telling you to do one or the other. Instead, I’m just trying to find words to describe what you’re already doing.

    So what’s the difference? You can see it. That’s how you knew to label it. But there must be more. I want you to ask yourself what they feel like. Is one easier than the other?

    Try it.

    Of course, it should be no surprise that giving up is easier than testing. Try it again.

    Testing is hard, right? Maybe it’s not super-hard, but it’s certainly harder than giving up. Where do you feel this difficulty? Where in your body?

    Try it again.

    Do you feel it in your jaw? In your fingers?

    Try it again.

    In your neck? In your eyes?

    Try it again.

    In your brain? Your back? Your legs?

    Try it again.

    In your breathing? Your ears? How about your thoughts?

    Try it again.

    Seriously, do exactly as I say, in the order I say it.

    Question

    Do you feel the difference between testing and giving up somewhere in your body? If “yes”, move on. If “no” or “I don’t know”, continue working on this exercise.

    So you feel the difference. Testing is harder than giving up. You feel it somewhere. Now, you may be right, you may be wrong, you may have in incomplete understanding, or this may all be obvious to you. No matter.

    Now, I think I might know why you test. It’s because you want to see if you have gotten good enough at the scale yet to play it at the current tempo, right? If so, that’s perfectly reasonable. You’re learning a skill, and you want to try it out.

    I’m going to give you something else to think about:

    Testing doesn’t work. It has never worked and it will never work. Testing is not the new skill. It’s actually the old way of doing things.

    Just think about it. Do the exercise again.

    I’m trying to put a voice in your head. A voice that questions your reality. You don’t have to take the voice too seriously. But is it possible that reality is not what your mind is telling you it is?

    Testing is not new to you. It’s probably very, very old.

    I can’t convince you of this. Do the exercise. The exercise is where the learning happens. If you’re not convinced, do it again. If you still aren’t convinced, and you still get frustrated trying to play fast scales, do the exercise again. After that, if it’s still not enough, let it go. It’s not a big deal.

    Question

    Are you willing to (sometimes) let go of testing while you practice scales? Are you willing to (once in a while) just give up and do the exercises as they are, being open to whatever shows up?

    If “no”, and you’re still interested in understanding what I’m trying to get at, go back to the beginning of the scale exercises and try them again. Take your time. There’s no benefit to rushing through these. Each moment you spend doing these exercises is an opportunity to learn something about yourself.

    If “yes” or “I’m not sure”, I’m really happy you’ve made it this far. You should know that you’re past the weirdest part. Now, we can start learning in earnest.

    How to Play Scales, For Real This Time

    Now, I want you to try the following, at all tempos:

    1. 1 drop every click
    2. 1 drop every other click
    3. 1 drop every four clicks

    The preceding exercises should be practiced in every key until they can be performed easily. They will teach you the basic ideas. Do not skip them. The shifting required in your brain to go from one to the next must become second-nature to you.

    Once you have mastered those, you are ready for the real scale exercise.

    Exercise: The real scale exercise

    Repeat this until you can play scale perfectly at 208, or until the timer runs out.

    1. Set the metronome to 208.
    2. Set a timer for 30 minutes.
    3. Play for 2 minutes at each click.
    4. If you are playing the scale note-perfect, return to step 1. Otherwise, decrease the tempo by 1 click.

    This exercise should be practiced in every key. You can try a variety of patterns, such as parallel motion, contrary motion, thirds, etc.

    Some advice about this exercise

    When you start this exercise, it will sound horrible. Absolutely horrible. In fact, you will make a complete mess of every scale. That is exactly as intended. Focus on the drop.

    Let me say, it may take years to master this exercise. However, do not let that discourage you. It’s important to realize that you are making excellent use of your time by practicing this. It does not matter that you are not playing “well.” This exercise is designed to teach you exactly what you don’t understand about scales. Thus, you will be spending most of your time in that area where your playing is imperfect. You must remember that this is the point. There is no sense in repeating that which you are already good at! You must always focus on dropping with every click.

    This exercise perhaps violates everything anyone has ever told you about how to play scales. It may be extremely challenging only for that reason. However, do not let that deter you. Try it for 30 minutes a day for a month and see if you don’t start to get the point.

    Once you get the hang of this type of work, you can decide for yourself how much time you want to spend on it. Eventually, this will be a good 5 to 10-minute warm-up before you start your “real” practicing. For now, though, make this a major focus. It’s not enough to “get” the exercise intellectually. Rather, the purpose of it is to provide an experience. That is, the experience itself will be the teacher, not me. So, do the exercise as printed, and let it teach you whatever it teaches you.

    Two common questions about playing smoothly

    “You’re just saying to accent every quarter note/eighth note/etc., right? What’s the big deal?”

    No, I’m saying to drop on every quarter note/eighth note, etc. In other words, a drop is not an accent. That is, an accent is a sound. However, a drop is a movement. Notes you drop on can be louder or softer than the surrounding notes.

    Do the exercise and see what happens. Focus on physical movement, not sound. The reason your thumb has unwanted accents is because you are dropping on the thumb, regardless of where it fits in the beat. This is such a simple problem, and most pianists completely overlook its cause.

    “I’ve already tried dropping on every four sixteenth notes, but I still have unwanted accents.”

    This sequence of exercises does not teach you to drop on every four sixteenth notes. It teaches you drop on every possible note at every possible tempo (by all means, add the ones I left out). Once you can do that, you cannot possibly have any unwanted accents anywhere. You will have total and complete control. And you will have gotten there easily, since you are focusing only on dropping with the metronome clicks.

    No thumb crossings, and no “thumb-over” or “thumb-under”. You didn’t have to make sure your hands were together, or push yourself to go faster and faster. There was no need to wonder if you’re supposed to land at the top of the scale, or just go straight back down. I didn’t ask you to play “lighter” or “to the bottom of the key”. Complete control, all without lifting a finger.

    Your turn

    Try these exercises on the piano. Try them with different scales, using both white and black keys. Don’t simply read this article, as it probably will not make much sense on its own. Then again, you might try the exercises and still find that you have no clue what I’m talking about. After all, everyone is different. If you find that you have a different perspective on this, let me know! 
>